Monday, December 30, 2013

Mojo Monday 326


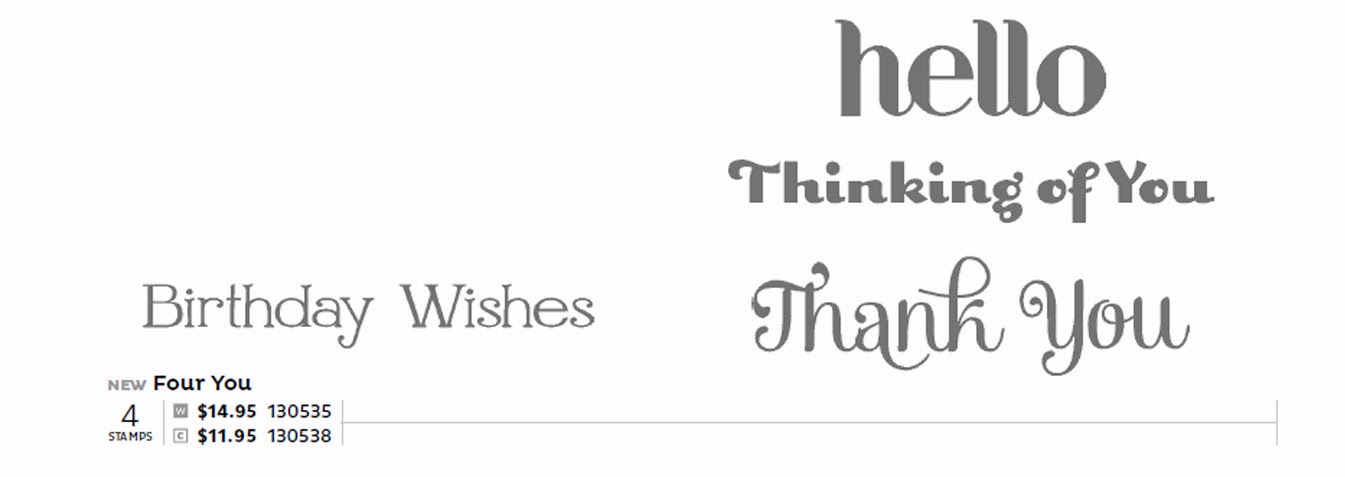
Hello to all of you today!  Are you as burned out on Christmas cards as I am? I love doing them, but by the time Christmas is over, I'm so done with it.   But, it's hard to move on, LOL. So, I just got this Four You sentiment set and decided to use it for todays Mojo Monday card.

I also dug out a DSP pack I haven't used in quite a while, Venetian Romance, it's got some great papers!

I started with Baked Brown Sugar, my new Incolors have been getting neglected. I choose the pretty Pistacio Pudding text paper from the pack of DSP for my first layer, then used the Baked Brown Sugar CoreDnations for some nice texture. I love a bit of shabby and I think this works well.  I used a retired piece of ribbon (sorry about that) as it's all I had in the Tangerine Tango, then layed over that another pretty piece from the DSP pack after cutting one edge with the wavy wheel on my Rotary attachment for my Trimmer.
BTW, that new Rotary attachment and the extra wheel cartridges are a great way to make a quick edge. I was worried about having to switch out the blades, they are so sharp it's not ever my favorite thing to do, but these are in little cartridges and you just slide one out and slide the other in, your fingers never get close to the blade, I love that!

I hope you enjoyed my little Hello card today, have a wonderful Mojo week! Here is this weeks sketch.


And here is the sentiment set I used. 
If you should want to check out the clearance rack, download a catalog or place an order, you can do so HERE  Thanks for stopping by.

Friday, December 27, 2013

Pals Paper Arts 185


Well! I really have been away from my blog for a long time.  I just got slammed by Christmas and then a little burned out. But I'm feeling better now and just had to play with this sketch. It's simple, but there are so many ways to use it.  The staff has done a fantastic job with it.   You really do need to stop by and see all the fabulous cards they have created.
Here is the sketch.


Just click the link on the right side bar and join in the fun.

There is a little sneak peek in this card, the Watercolor Wonder paper. It's really soft and pretty. But I love watercolor so it spoke to me. It's in the new Occasions catalog which will be live on Jan 3.

I used Daffodil Delight, Tempting Turquoise, and Whisper White.
Products in this card include, Watercolor Wonder DSP (132994)
Silver Foil
Silver Ribbon
Label Love Stamp set and punch
Rhinestones
I'll try to post more often now that the holidays are over, at least until my surgery in Jan, then I'm not sure how soon I'll be able to get back to playing with paper and ink, not too long I hope.

Thanks for stopping by and if you are so inclined and would like to purchase from me, or just download current catalogs, or do some window shopping and see current promotions, go
HERE

Saturday, December 21, 2013

Stampin Up Last min Christmas card


Embossing folders are my favorite quick ways to dress up any card.  I used Beautifully Baroque embossing folder and Real Red for both the base card and the embossed layer. I ran Whisper White ink using my brayer over the embossed piece to bring out the embossing.

I then layered a white deco framelit with the sentiment stamped on it from Christmas messages, over a Real Red deco framelit piece and attached to the card.  I wrapped and tied a piece of Organza ribbon around the embossed piece before attaching to the card base, and that is it.

Hope you enjoy, and have a Merry Christmas.

Monday, December 16, 2013

Mojo Monday 324, Sneak Peek 2014 SAB


I fell in love with this sketch the minute I saw it. And since I have most of my Christmas cards done and ready to go out, but am short a couple, that decided the theme for it as well.

Don't you just love those little banners? They come in a set and there is a little banner punch as well.
Both the banner punch and Banner Blast stamp set and freebies in this years SAB sale.  It doesn't start until Jan 28th so you have a wait, but such cool items for free. If you don't know how this sale works, well, you buy $50 in product in any current catalog and you get to choose one free item in the SAB catalog. You can get as many as you like, just spend the $50 for each choice.

So, I only used a couple colors, Whisper White, Perfect Plum and Elegant Eggplant.

Banner Blast stamp set
Banner punch
Sweet Essentials stamp set for the sentiment
Festive Flurries stamp and dies
Gold Twine, in the Occasions mini catalog, it starts Jan 3rd.
Silver Glimmer paper.

I hope you have enjoyed this little peek at the coming goodies.
If you don't have a demonstrator and would like an Occasions mini, leave me a note with an email or other way to reach you. Or you can email me at KRAFTYCAT AT GMAIL DOT COM

Thursday, December 12, 2013

Pals Paper Arts 183


Todays share is from the PPA 183 challenge. Colors in the challenge are Rose Red, Whisper White and Wild Wasabi.

I have been dying to use the brand new embossing folder, it's todays sneak peek from the new Occasions mini Catalog. Love, love, love it.

Card base is Whisper white, then a Rose red layer, the top and bottom edges were cut using one of the new rotary trimmer wheels for the Stampin Trimmer. These kind of little cuts just add so much to a card.
On top of that is the scallops embossing folder in white.
Then the sentiment from Wishing You and the tiny gift box from that same set cut using one of the Apothecary Accents dies, with Rose red oval from the Oval Framelits under it and 2 rose red candy dots on the side.
I recolored a Very Vanilla Seam binding ribbon to go around.
I hope you enjoyed, just leave a comment if you want to ask a question and I'll be happy to answer within the comments section.  Blogger doesn't give me an email address to use for anyone.

Merry Christmas.

Monday, December 9, 2013

Mojo Monday 323 and Sneak Peek Occasions 2013


I decided to make my card a Thank you card, we all need those this time of year. Here is a sneak peek at some new product in the Occasions catalog. Ordering doesn't start for this one until Jan 3rd.

But I am loving all the watercolor product in there, this back ground paper is Watercolor Wonder DSP, also you are seeing one of the So Very Grateful images. I have so many ideas for this one.

I also used the gold twine, wow, it's gorgeous. It does not show well, but it's thicker then the other twine and the gold is very shiny.
There is a Green candy dot holding the Thank you on, if you haven't seen candy dots, you are missing out. They look like brads, but no brad, and they have adhesive on the back side and stick great and are easy to get off the backing.

Here is the sketch for todays card.

Thanks for stopping by, hope you have a wonderful week.
If you would live to check sales, download a catalog or place an order, please click
HERE

Thursday, December 5, 2013

Stampin Up, Pals Paper Arts 182


Yup, I'm still doing Christmas cards here, time is running short and I still have cards to do.
Today is a color challenge from PPA. 


And here are our colors.  They work together very well and I sometimes forget about Elegant Eggplant, it's been in the color line for so long.

I used the Smoky Slate for my card base then cut each layer 1/4" smaller on 2 sides so the colors are just peeking out.     Ran the Designer Frame 123130) through the Big Shot and stamped the deer (Best of Christmas) 134384, in the center.
I used Smoky Slate Chevron ribbon across the bottom layering the banner from Perfectly You Stamp set (Holiday catty Hostess set). I used my blender pens to color in just a bit.

I then cut 2 little banners from the Eggplant and put on each side. That's it.
Thanks so much for stopping by. 


Tuesday, December 3, 2013

We're still doing Christmas


Ready for yet another Christmas card?   I just can't help myself, and I do have to get my cards done somehow.   I'm not a green person, but decided some of you are so maybe I should do one.

Besides, green goes with the stamp set. Lovely as a Tree.   I stamped my tree with Garden Green, and used Cherry Cobbler Dazzling Details for the ornaments.  I cut it out using my Big Shot and the Apothecary Accents Framelits.   Then I cut the same framelit out of Silver Foil and cut across the middle  in both directions so I could bring it out slightly. I added the silver stamped pine in the corners and a rhinestone at the top of the tree.  The Joy stamped at the top is from the Endless Wishes stamp set.  
I'm sorry to say that Endless Wishes is a photopolymer stamp set and was sold out and is not coming back from what we are told.

If you would like to see what the latest promotions are or place an order you can get to my SU web site HERE

Thanks for stopping by.

Monday, December 2, 2013

Mojo Monday 322


Welcome to todays Mojo Monday card, I'm using all these challenges to get my Christmas cards done. Seems like the only time I have.

I started with Very Vanilla today, overlaid with Winter Frost DSP (132341)
Cut a piece of Real Red 2 1/2" wide and wrapped the ribbon around making a bow which I attached the Silver Glimmer paper Chalk Talk framelit bread tag to.   Then I stamped the message using Tag It, which uses the Chalk Talk framelit dies and is the Ronald McDonald house stamp set this year. Money from this set goes to the Ronald McDonald house and ends up doing a lot of good.

Here is the sketch, come play along.

Thanks so much for stopping by, come back anytime. Let me know if there is anything you'd like to see done.

Saturday, November 30, 2013

Stampin Up Gift Card and Envelop


I love this little gift card with it's own envelop.

I used some retired DSP that had been 12x12, after they retired I cut them all to 6x6 and they have come in really handy.
This card is 3 1/2" square so I used the envelop punch board to create an envelop to match it.

The card is done in Crumb Cake with white snowflakes from the Best of Snow Stamp
set.  I layered a little piece of glimmer paper cut using the Modern Label punch then the Let it Snow cut out using the new Label bracket punch from the Holiday catalog. It comes by itself or in a bundle with the Tags 4 You stamp set that has four saying to be cut using the punch plue a To: and From:.
The blue is my favorite, Marina Mist.


Thanks for stopping by, and Merry Christmas.
Should you want to download catalogs, check out specials or place an order, please click
HERE

Friday, November 29, 2013

PPA 181


It's been a busy week, so I haven't posted all that much, but that's life, isn't it?

For this card, I have to say, I've been struggling with making a card using a template that both reflects the template and that I like when I'm done. I think I did it this time, altho I did stray some from the template, but it's all about inspiration and the template is just the starting point.
Cherry Cobbler is my all time fav color, especially for Christmas, unless it's a really nice blue, I am a blue kinda person.

So, this is simple, just Whisper White and Cherry Cobbler. Cherry base, white on top, then I used the Labels collection framelits, first layer is using the Season of Style DSP, I have the small pad, 4 1/2x 6 1/2, then a layer of Cherry, then white with the sentiment from Christmas Messages (Holiday catty)
embossed with a versamark and cherry cobbler embossing powder. I did ink up the edges a bit too.

Then I cut a small piece of white ran it through the Chevron embossing folder added a ribbon bow. For the ribbon I used Seam binding in Cherry cobbler.

Hope you enjoy, come on and check out the PPA challenge and create your own card.


Thanks so much for stopping by.

Monday, November 25, 2013

Mojo Monday 321


I'm taking a little break today from Christmas projects. I have a group I need to do some birthday cards for and this looked like a good chance to get started on that.

With a little change in colors this would work as well for a masculine card, using blues with the grays would work really well.

I did use quite a lot of framelits on this, but if you don't have them, you can do just fine without. The largest square on top of the card base is the largest of the square framelit dies, but you can just cut a square using your trimmer or if you want you can use a punch to end up with the scallops.

Colors:
Very Vanilla
Smokey Slate
Strawberry Slush
Pink Pirouette

Supplies:
Square Framelits  130921
Sketched Birthday stamp set
Finishing Touch edgelits 127010 (edges on the banner piece)
1 3/4 scallop round punch
Bitty Banner Framelit  129267
Eastern Elegance DSP 130131
Seam binding

I used the Very vanilla seam binding to make my ribbon, I just used a piece of sponge and sponged on color from the ink pad.  To color in the graphic I used my blender pen and ink pad as well.

Let me know if you have any questions, as Blogger doesn't let me know your contact mail I will have to answer in the comment section, but please feel free to ask anything, I do get them in my email.


Thanks for stopping by today.

Saturday, November 23, 2013

Stampin Up 10 days of Christmas, day 10, a little late


I have missed a day, so sorry, life just got in the way.  But I have a sweet one for you today, and I still have more so will be continuing to post Christmas projects.

This is done with the stamp set Joyful Christmas in the Holiday catalog. I used Pear Pizzazz for my base, then Real Red, Stamped the pointsettia with the versa mark pad or a silver pad, then silver embossing powder and heat. Do the same with the sentiment. I used one of the grunge stamps for the silver snow and embossed them too.
Then added rhinestones that I colored using my Blender Pen and red ink pad. Done.

Hope you enjoyed this one.

Hope you are making headway with your own Christmas cards.  I did a little Holiday bazaar today. I hope I was able to let some people who had never heard of Stampin Up know just what we are all about and I may have a new recruit and a couple new customers for my classes.


Thursday, November 21, 2013

PPA 180 and the 10 Days of Christmas, Day 9

You know how when you think of Christmas, we all picture sleding on pretty fresh snow? That was my intent with this card.

Sometimes it can be hard using a template, and I struggled with this one. To me, it looks like that pretty snowy scene at Christmas time.
What do you think?

I started with an Island Indigo base and sized this one at 5x5". I haven't made an envelop for it yet, but I will soon. The new envelop punch board makes that possible, now I can have envelops for these square cards.

I used Winter Frost Designer series paper on the bottom (132341) Holiday catalog, and embossed a piece of white for the top using the new Pretty print embossing folder (132175) holiday catalog, for the top, I ran the brayer with Island Indigo ink on it over the top for some color.

The ribbon is Pool Party seam binding, and after stamping and coloring the snowman (Best of Snow) (134387), I cut him out using the xl oval punch. I inked the edges using Island Indigo.

I added 2 pieces of silver glimmer paper over slightly larger Island Indigo  and stamped the sentiment, Embellished Events, and cut banner ends on one end and adhired using a candy dot.


Hope you enjoy.  And come back tomorrow for #10.

Wednesday, November 20, 2013

10 Days of Christmas, day 8


Welcome to day 8 of my 10 days of Christmas.   

This card is dedicated to my friend Shirley who is also my customer. She just couldn't figure out why they would even put this cute little leaf stamp in  the set with that big pretty pointsettia.

I started with a Pear Pizzazz card base, I cut my white CS short on the one side and stamped the leaf twice. I used Real red candy dots. If you haven't tried out the candy dots, you just have to. They are so awesome and slide off the plastic for reattaching very easily.

I stamped the sentiment just under the leaves.

I attached a little strip of Silver Glimmer paper along the side and then glued the whole thing to the base.


Thanks for stopping by, see you tomorrow for card #9.

Tuesday, November 19, 2013


Welcome to day 7 in my 10 days of Christmas.  We are doing a santa card today.

The Santa image is from the Best of Christmas stamp set, (134384) clear.  And the Sentiment is from Christmas Messages in the Holiday catalog.  I used Cherry Cobbler for my base card, cut a Whisper White piece 4"x5 1/4,  Emboss the oval from the Designer Frames embossing folder (123130), then
stamp Santa in the center.  

I used my Blender pen to color in the image.

Stamp the sentiment on the lower right bottom, tie a piece of Cherry Cobbler seam binding around just above the sentiment, then glue that piece to the base card. Done.
It's pretty quick and simple, but really cute.


I had a new class today and they loved this card, 2 were new stampers and it made up really quick for them as well.  
Thanks for stopping by and be sure to stop by tomorrow for #8.

Monday, November 18, 2013

!

The 10 days of Christmas, Day 6


Very simple card for day 6.  I used Midnight Muse and whisper white, with gold embossing ink and powder on the deer.   The deer and sentiment are from Warmth and Wonder, one of the Hostess sets in the new Holiday catalog.  

Midnight Muse card base, then Whisper White layer. It might appear to have squares of midnight muse then white again, but instead I used my square framelits to make a hole in the white layer.

I then stamped and embossed the deer and cut a smaller size framelit applying using stampin dimentionals.     3 rhinestone on the side add a little bling to a simple card.

Hope this give you some inspiration.


Thanks for stopping by, please come again tomorrow for the next in the series.

Sunday, November 17, 2013

10 Days of Christmas Day 5


I think this one is simple and elegant. 
I started with Whisper White CS as my base card. Cut a piece of Cherry Cobbler 4"x5 1/4" and glue to base card.

Cut Whisper White CS 4 3/4"x 5" and run through the Big Shot using the new Stylish Stripes embossing folder, available in the Holiday catalog. (132174)

Attach a length of Cherry Cobbler ribbon, Holiday catalog (132135) to the white embossed piece, cut bottom into banner shape and tie above it with Bakers Twine.

Stamp Joyful Tidings from Christmas Messages Holiday catalog, onto a piece of white, cut out using the Decorative Label punch. I punched another piece of Cherry Cobbler cutting it in half and bringing
the sides out slightly.

Glue using stampin dimentionals.

That's about it, hope this gives you some ideas for your holiday cards.


Saturday, November 16, 2013

10 Days of Christmas Day 4


I love snowflakes, seems like much of what I'm doing this Christmas is using snowflakes. But I only like the stamp ones, not fond of the real thing. I lived in MT for too long, that was enough of that. LOL

I used Crumb cake as my base, then Real red  then Crumb Cake. On the card base I used the smallest of the Festive Flurry stamps and stamped in white.

I then took the smaller Crumb cake and stamped and gold embossed the largest of the Festive Flurry stamps, making sure to not go more then 1/2 way in so there was room for the sentiment.
I stamped the sentiment from Joyful Christmas (Holiday catalog) in Real red.  Glued that to a slightly larger Real red piece of CS.
Done, pretty quick and simple.


Thanks so much for stopping by. Hope you enjoy the projects.
Stop by tomorrow for another one.

If you would like to place an order or just see what's new or download a catalog, please  Click Here

Friday, November 15, 2013

Day 3 of the 10 days of Christmas

I have something special for you today. At least I think it's special, you can let me know if you think it is too. I spent most of the day making this.

I know, it doesn't look like it would take that long and if I'd known exactly what I wanted to do, it probably wouldn't have. But it was design as you go today. I'm doing a Bazaar in a couple weeks and this is going with me, for now it's hanging up to greet my classes this week.

I used the round framelits, Festive Flurry stamps and dies (Holiday Catalog), Stamped the big Doily in Whisper white and embossed in white.  There is glimmer and silver paper Festive Flurry cuts as well.  This round scallop is the largest size in the Round Framelits.

Sure hope you enjoy.
Thanks for stopping in and have a great day.

Thursday, November 14, 2013

PPA 179 and 10 days of Christmas, Day 2


Todays card is the Challenge for Pals Paper Arts, A bit of a strange color set maybe, but these were the challenge colors, Crumb Cake, Crushed Curry and Rich Razzleberry.   But those were the colors so we made do! I love it, you just never know what non traditional colors will work.

Base is Crumb Cake, then I cut a piece of Rich Razzleberry from the Top Note die and stamped and embossed the O Holy Night stamp using Whisper white ink and powder.  I used a tiny stamp from the Warmth and Wonder Holiday Hostess set and stamped all over the base in Crushed Curry.

I cut a strip from silver Glimmer paper and glued down the middle of the card, then overlaid the Top Note piece.    I used the smallest of the snowflakes in the Festive Flurry stamps and die set, one in crumb cake and one in white with Rich Razzleberry ink, cut and used Stampin Dimentionals between the two layers and to apply to card. I topped it off with 3 rhinestones, one on the snowflake and two on the card top and bottom.

I hope you enjoy.  Now check out the other cards at the PPA challenge.

See you tomorrow for another card in this series.


Wednesday, November 13, 2013

2013 Ten Days of Christmas, Number 1

Are you ready for Christmas? Stop by here each day for the next 10 days for something new to make for Christmas.   First day we have a card.

This is a very simple, but striking card. First I stamped the snowflake from Endless Wishes Photopolymer stamp set on Crumb Cake CS.

Cut a piece of Whisper White CS and stamp the tree from Lovely as a Tree three times using embossing ink and emboss in white. I used our Whisper White ink and embossing powder.

Now take your Pool Party ink pad and sponge ink over and around the trees, the embossing will act as a resist and won't take the ink.

Next stamp the sentiment using Island Indigo ink.  I used a combination of words from Endless Wishes to create my sentiment, put them together on a clear block, inked up and stamped at one time.
Finish off with a pretty 5/8th inch Organza Ribbon.   And no problem going through the mail.


I just love this set, it's so nice to be able to put together my own sentiment, and the snowflakes are darling.  Just in case you can't read it the numbers for ordering are 133455 and all these sets are $13.95 each.
If you would like to order or just check out the catalog or promotions that are current please click
HERE
As always, thanks so much for stopping by. Please let me know if you enjoying see my 10 days of Christmas and if it's helpful for you. Thanks.

Saturday, November 9, 2013

Modern Medley Blossom

I love the look of black and white, this DSP pack is full of just that in really cute designs.  I started with one of the flowers from the Fun Flower Bigz L die.  It's much easier to get exact placement using dies as often the punch won't go in far enough.
I put a square of DSP on the back side of the top piece, stamped out one of the Four frames stamp set,
Stamped the sentiment in the middle, then put a hole in each side to run the Black taffeta ribbon through.
I used just a 1/4" later black CS under it with the Whisper white again as the card base.
Simple and quick.


Although not new this year, this is a darling set good for so many things and the Decorative Label punch makes short work of cutting it out for added pop.
Thanks for stopping bye, if you should want to order, download currant catalogs or just see what promotions are available, Please Click HERE

Sunday, November 3, 2013

Stampin Up Happy Birthday Ticket

I love sets that work for more then one thing, and this ticket set made getting the ticket punch way more interesting.  There are several sentiments plus blank tickets, but with all the new Holiday goodies coming out I haven't used it as much as I wanted just yet.

So, thought I'd put down Christmas for a min. and do something else. It also gave me a chance to use Yippee Skippee too. Fun sentiment set! I wanted to add a little something extra but not over powering to my card, so I used the Needlepoint border embossing folder twice and put the ribbon in the resulting space.  I loved that you can make this a multi color set and it looks so cute that way. 

Colors:
Smokey Slate
Tempting Turquoise
Pear Pizzazz
Strawberry Slush
Daffodil Delight
Perfect plum

Supplies:
Yippee Skippee sentiment stamp set
That's the ticket stamp set
Duo Ticket punch 126883
Needlepoint embossing folder 129383
1/8th inch taffeta ribbon  131207


Thanks for stopping by, hope I've given you some ideas for your own cards.
If you would like to see what's new, check out clearance items or do any kind of SU shopping, just click HERE

Thursday, October 24, 2013

Stampin Up, PPA177


This week we have a sketch challenge at Pals Paper Arts. I just love this little nativity scene.

I used Smoky Slate for my base card and Winter Frost DSP (132341)
The cute nativity is from the new Best of Christmas Set, (134384) Clear, each month SU comes out with a new Best of set. Mostly made up from the best of retired stamps with at least one new image included.
The Sentiment is from Wishing You from the Holiday Catalog. And a Candy dot attaches it to the card.

The snowflakes are hard to see as I had to lighten up the card so much, but they are all over the top piece.
I colored in the image using my blending pen and ink pads.


Thanks for stopping by, and just wondering, how are you coming along with your Christmas cards this year?

Monday, October 21, 2013

Stampin Up and Mojo Monday 316

I was tempted to do a Christmas card, I'm not making much headway with my own cards this year. I've been busy making quilted Christmas gifts and stuff for my SU classes, but I do enjoy my classes.

But, I've been wanting to use the birthday sentiment, and this was the perfect time. I paired the Delightful Dozen sentiment with Birthday Basics DSP.

Colors:
Very Vanilla
Raspberry Ripple
Crisp Cantaloupe

Supplies:
Delightful Dozen stamp set
Birthday Basics DSP (130145
Incolor 2013-2015 Core' dinations card stock (129958)
Circle Framelits (130911)
Rispberry Ripple Satin Stitched Ribbon (126845)
Finishing Touches Edgelits (127010)

I made the little 1/2" banners by using my 1" square punch, then cutting them in half. 
Here is the sketch:
Hope you enjoyed todays card and it have you some ideas of your own. 
As always, thanks so much for stopping by.