Wednesday, December 26, 2012

Another Fast and Fabulous 10 min card

Colors
Very Vanilla
Crumb Cake
Rose Red
Supplies:
Embellished Events
Decorative label punch
Designer Series paper pad, Subtles
Love this combo of colors, quick and simple birthday card.
Cut your crumb cake piece first the size you want then the patterned paper 1/4 to 12 inch smaller depending on the look you want.
Stamp your image and center in the punch from the back side and cut. Stamp sentiment and I used rhinestones, one on either side.
Or you could put 3 rhinestones in the upper left corner.
Hope you enjoyed, thanks for stopping by.

Thursday, December 20, 2012

PPA Challenge 149


Pals Paper Arts last sketch challenge of the year.
I've been so busy getting ready for Christmas and our trip that I didn't get this done when I should have, so here I am late at night getting my card done.  There is no telling what I'll end up with when I'm tired, but I think I did ok, don't you?
Colors:
Whisper White
Rose Red
Pink Pirouette
Not Quite Navy
Supplies
Embellished Events stamp set
Petals A Plenty embossing folder
2 3/8 inch scallop round punch
2 1/2 inch round punch
Curly Label punch
and for the bling, Rhinstones. I love bling, it takes a so so card and makes it special.
My tip for today is: Add that bling.
All Stampin Up products of course. 

Monday, December 17, 2012

Mojo Monday 272


I am loving this sketch, how fun is this? I kept it fairly simple I think, but added in some fun elements
Colors:
Whisper White
Real Red
Supplies:
Papillion Potpourri  #123757 Wood,  #123759 Clear
Elegant Butterfly punch  #127526,
1 inch square punch  #124094
Fancy Fan embossing folder  #127751
Rhinestones  #119246
Ribbon   I have to admit to using a retired ribbon, Christmas wiped me out of red ribbon. The 1/8th inch taffeta ribbon would have been excellent on this. #119251. At least that's what I would have used.
For layering I cut the red on top of the white card 1/8th inch smaller then the card, and cut the white 1/8th inch smaller then the red, and embossed it.
Be sure to watch for the new butterfly punch coming in the spring catty, it is sized for the smaller butterflys in this set.
So, here is the sketch:
Have a great week!

Friday, December 14, 2012

Stampin UP Clearance Rack now open


Over 300 items have been added to the clearance rack.  Stamp sets, current ink colors ect.
Click HERE  to Shop now.

Wednesday, December 12, 2012

Fast and Fabulous 10 minute card

Actually, I think this is really a 5 min card, I think the upgraded card doesn't take more then 10 min.

Here is version 1 of my Fast and Fabulous card for today.  One stamp set, one half piece of Whisper White Card Stock.  One color
Bashful Blue
Snow Swirled, Big catty, Page 18. 127799 Clear,  111690  Wood.
This has been my very favorite set of the season. I do love snowflakes and also whimsical, so paired together they were a natural for me. I used the medium and small snowflake and the sentiment.
I had decided to stamp on my envys for the first time ever. And while I was stamping away with the snowflakes, I first thought, Gee, if these hit back weather on their way they are going to look just awful.
My next thought was, gee, this is really pretty, bet it would make a wonderful, quick card.  And it did.

So, here is how I upgraded it, but I still think the original is gorgeous.
As you can see, I've added the envy here for you to see. It's a bit hard to see I know, such a light color.
I used the Bashful blue as my card, then cut a piece from white, stamped on it, ran it through the embossing folder and added a piece of Midnight Muse Ribbon. Bashful blue ribbon or Marina Mist ribbon would have looked great too, but this is what I had.
I then stamped the sentiment on white and used my Decorative Label Punch #120907 to punch out the shape and put Stampin Dimensionals on the back to attach. That's it.
Here is a close up of the envy, I just did a few snowflakes along the one side.
I really hope you enjoyed this and it gave you some ideas. This will probably be my very last Christmas card, it's almost here.


Monday, December 10, 2012

Mojo Monday 271

And it's time for a new sketch again. Here is my take on the sketch.

colors used:
Very Vanilla
Raspberry Ripple
Pink Pirouette
Supplies:
Pretty Postage,(the candle cake)
Delicate Doily Sizzlits L for the doily
Brights DSP Stack, base patterned paper.
Word Play (Wish big sentiment)
Seam Binding
Scallop edge punch
I cut my card length wise, making it longer and narrower instead of the more usual way of cutting across the short side. It's still the same size, it just opens different.
I love the Designer Series Paper Stacks. There is one for each color set and they are double sided with patterns perfect for cards.
Thanks for stopping by, be sure to stop in wed when I post another Fast and Fabulous 10 min card. It actually makes up in about 5 min, but I have also made an upgraded card with matching envy. That one only takes 10 min.

Thursday, December 6, 2012

Pals Paper Arts challenge 148


Colors to use for the PPA 148 were Cherry Cobbler, Always Artichoke, and Crumb Cake. I used Very Vanilla as well.

I used Holiday Ornament framelit dies for my glitter ornament, Delicate Doilies stamp set. Cherry Cobbler seam binding, and Bakers Twine and Petals a plenty embossing folder. Sentiment is from Curly Cute.
Have a great day!

Monday, December 3, 2012

Mojo Monday 270


Welcome to my version of Mojo Monday. I went off sketch today, but you know how that goes, don't you? I started off to use this stamp set and from there I just seemed to loose control and it made itself.
It's a darling sketch, and got me started in the right direction.
Colors:
Very  Vanilla
Crumb Cake
Always Artichoke
Soft Suede
Old Olive
Supplies
Best of Everything Stamp set
Delicate Designs Embossing folder
Designer Series Paper Stack in Brights
Apothecary Accents Framelits dies

Have a great day.


Sunday, December 2, 2012

Tags, tags and more tags


I thought a few cute Christmas tags were in order. These should take care of my little gifty bags to my girls this year.  Tags can be worked up using most anything. Look at your punches and see if they might lend themselves to being a tag. The top of the Very Vanilla Joy tag is from the Delicate Doilies Sizzlits die, and the center green decoration is one of the stamps in the Ornament Keepsakes stamp set. White on Crumb Cake is a great look also,  And the white doily is also part of the Delicate Doilies die.
I hope these give you some ideas for your own tags.
Have a great weekend, and get some stampin done.

Saturday, December 1, 2012

Snowflakes and Joy


You will very rarely see me post a totally one color card, even white. This one was still needing a little something even with the dark CS.
I like it so much I made 3 of them to send out, I do need to get busy if I'm going to get 30 or so made up.

Colors:
Whisper White
Not Quite Navy
Supplies:
Word Play, (sentiment) 126382 (clear)
Northern Flurry embossing folder 120902
5/8ths inch Organza Ribbon  114319
Rhinestone 119246, yes it's there on the sentiment.
After embossing the white, I gently brushed the sponge with a bit of Not Quite Navy ink on it, over the snowflakes.
Merry Christmas and happy card making.

Thursday, November 29, 2012

Fast and Fabulous 10 minute Christmas card

I know I said on Wed I'd post the FF 10 min cards, but it's Christmas and if you haven't gotten your cards done, it's time. I hope this will help you, these are very quick, easy and look so fabulous. I have done two of the same card, just changing out the colors.
One of the easiest ways to made a big difference in your cards is embossing folders. Takes no time at all to run a piece of CS through the folder and it can look so awesome.


Here I used Rose Red and Very Vanilla.
The folder used is Northern Flurry #120902 pg 189 in the main catty.
Image is from Embellished Events  #126497(clear)  pg 40
I love this stamp set as it gives you 6 different images for so many events, plus the sentiments, in this case the Merry Christmas, is separate from the image stamp so you can mix and match them.

Here I used Midnight Muse, and my Craft White ink. It's a favorite of mine, you can use it to wet emboss, or just stamp on dark CS with it. It will take just a bit longer to dry however. The ribbon here is Very Vanilla Seam Binding. One little tip using the seam binding. The cartridge glue doesn't stick to the ribbon very well, so I usually use the Glue stick.  You can pretty much do any color combo you like with this one.

Bye for now.

Tuesday, November 27, 2012

Fast and Fabulous 10 minute cards

I have decided it would be fun to post some pretty, neat cards all done in 10 minutes or less.  I'll be doing them on Wed's.
So, here is the first one:

Colors:
Baja Breeze
Crumb Cake
Very Vanilla
Supplies:
2 1/2 Ince Circle punch    #120906
1 3/4 inch scallop circle punch   #119854
Elegant Butterfly punch   #127526
pearls #119247
1 1/2 inch by 5 1/2 piece of Designer series Paper pad, Subtles collection ( I love all of these)#117152
Wacky Wishes ( Sentiment) (Hostess set)
Everything by Stampin Up
I hope you enjoy!

To Order Stampin up, click HERE
I got to thinking that some of you might want to spend a couple extra min and add to the card, so I thought I'd give you some ideas on doing just that.   I have made a second card with a couple changes:
 I added a scallop circle out of Soft Suede which goes so well with Crumb Cake.  I also cut my patterned paper at 1 1/4 inches, and cut a piece of Baja Breeze CS 1 3/4 inches, then cut the edge with the scallop edge punch. This punch uses 1/4 inch of the paper after cutting. I added a piece of soft suede ribbon over the pattern paper tucking the ends behind it. Glue them down and then glue the paper to the CS.  
Also, I used rhinestones instead of the pearls. Not that it's better, but so you could get an idea of how they work. I love the rhinestones and pearls, such an easy way to make it elegant. 
Tip working with rhinestones and pearls. The glue holds them to the waxed card, use a twizzer and push down hard while pulling away to keep the glue attached to the pearl or rhinestone. 
Let me know how you like this idea. Which card to do like better, is clean and simple your style?   
Come back tomorrow, thurs for a Fast and Fabulous Christmas card, you can do all your cards using this idea, in one evening. 

Monday, November 26, 2012

Mojo Monday 269


I used todays sketch for another Christmas card, I really love how it came out. Here is the sketch today, afraid I didn't stay completely true to the sketch, but...........
Colors:
Raspberry Ripple  (In color)
Whisper White
Brushed Gold cardstock.  #102935
Supplies:
Cherry Cobbler Embossing powder #122949
Festival of Prints DSP, (Holiday catty) This pad comes in 4 1/2 x 6 1/2, so very usable for cards.
#126904
Rhinestones.  #119246
Delicate Doilies Sizzlits L die. It makes 3 different doilies at one time # 126999
Northern Flurry Embossing Folder  #120902
Perfect Dots Embossing Folder   #117335
Ornament Keepsakes Bundle, has stamps and die cuts for the several ornaments. Clear #129950
2 1/2 inch circle punch  #120906
Gold Stampin Dazzle marker  (Holiday) #128979
The gold CS doesn't show well in the photo, but it's gorgeous when you see it.  I used the gold Dazzle marker to go around the cut out ornament where it was white.
I punched out my circle, then inked the edges and ran it through the embossing folder placing it right over the large snowflake.
Thanks for visiting, have a great week.

Saturday, November 24, 2012

A pretty and simple Chrismas Card


I love how simple and quick this one was to make, but it's one I'll be proud to send out.  
Colors:
Cherry Cobbler
Wild Wasabi
Whisper White
Supplies:
Seasonal Saying, Christmas   Available as a single stamp or in the set
Pretty Petals embossing folder
Labels Collection Framelit dies
Cherry Cobbler seam binding.
I used the Wild Wasabi as the first layer, then embossed my piece of white. I ran the brayer over the Cherry Cobbler ink pad until it was covered then over the top of the embossed white.  Cut your two pieces out of the Labels framelits, stamp on the white top, and layer together. Wrap the seam binding over top and to the back for an inch or so on either side, of the embossed piece and glue it all together.
Hope you enjoy this and that it gave you some ideas for your own cards.

Tuesday, November 20, 2012

Just another Christmas Card

I hope you all are enjoying all these Christmas cards, I'm having a lot of fun making them. Usually I make just one and make lots of them, so this is different for me too. But it's a lot of fun sharing them as I go.
I made one a couple days ago that I just fell in love with, my favorite color is blue, often I have to stop myself from using nothing but blue.
Colors:
Bashful Blue
Marina Mist
Whisper White

Supplies:
Snow Swirled stamp set  (127799) Clear
White craft ink pad  (101731)
White embossing powder (109132)
Sizzlits Delicate Doilies  (126999)
1 inch circle punch (119868)
En Francias background stamp  (109521)
Ornament Keepsakes  stamp set (top circle) (128051) bundle (129950) includes die cuts and clear mounts.
White Organza ribbon (114319)
Embellished Events (sentiment) (126497) clear

Thanks for looking.

Monday, November 19, 2012

Mojo Monday 268 and Huge Sale at SU


The big sale starts today Mon Nov 19th and ends Wed, Nov 28. There are some today only sales and some wed only sales to check it out now. Click on the graphic to go to my store and the sales items and to purchase.

Now, on to our Mojo monday post. This sketch was a real challenge for me. I don't know why, but it just didn't roll off my work table for some reason.  It happens sometimes and sometimes it just goes together like someone else is doing it.
Colors used:
Very Vanilla
Bajo Breeze
Cherry Cobbler
Supplies:
Sizzix Small Doilies
Labels Collection Framelits
Snow Festival Designer Series paper ( Holiday catty)
Mini Ornament punch (Holiday Catty)
Seam binding ribbon
Four Seasons stamp set (hostess set)
Word Play stamp set for sentiment
Ornament framelit
1 inch circle punch
Thanks for looking, I've got goodies to upload for tomorrow, so I hope to see you back.

Friday, November 16, 2012

Stampin Up biggest sale of the year


Starting Monday, Nov 19th, until Wed Nov 28th, Stampin Up is having a huge sale.  You will have to log into my SU site on monday to see the bargans. You will not be disappointed.

To Check out the huge bargains, starting monday Nov 19th, CLICK HERE

Pretty Pink Petals


I thought I'd mix it up today. This could be most any kind of card, birthday, Love, whatever.
I started with Whisper White CS, added a Pink Piroette layer, then a Tempting Turquoise layer. I used the Fancy Fan embossing folder on part of the final Whisper White layer, leaving a clean space for my flowers.
They were created using the BoHo Blossoms punch, adding a brad in the center and a Pretty In Pink Scallop Spotted ribbon.
Cut one Pink Piroette from the Decorative Label punch and add sentiment from Petite Pairs stamp set.
Cut second Decorative Label from Tempting Turquoise, cut in half and layer under the Pink one.
That is pretty much it, quick and easy.

To order SU from me, click HERE

Monday, November 12, 2012

MoJo Monday 267


Here we are again, week 267 for the Mojo Monday challenge. Probably no surprise I have another Christmas card for you. At this rate, I'll have mine all done soon.
Very simple card to make and I kept pretty close to the sketch this week too. I've been looking for an excuse to use that snowflake embossing folder, it's part of a set of small folders called Delicate Designs and has a matching die cut.
Colors
Real Red,  ink 126949  paper 102482
Baja Breeze  ink126960,  paper 111352
Whisper White  paper 100730
Other supplies
Embellished Events Stamp set  wood 126495, clear 126497
Snow Festival Designer Series Paper  (Holiday Catty)  126908
Delicate Designs Embossing Folder  127023
Snow Swirled stamp set (snowflake) wood, 111690  clear 127799
Real Red Grosgrain ribbon
Scallop Edge Border, 119882

Thanks for stopping by.

Saturday, November 10, 2012

Day 10 of the Ten Days of Christmas, an Ornament

I promised you something special today and here it is.

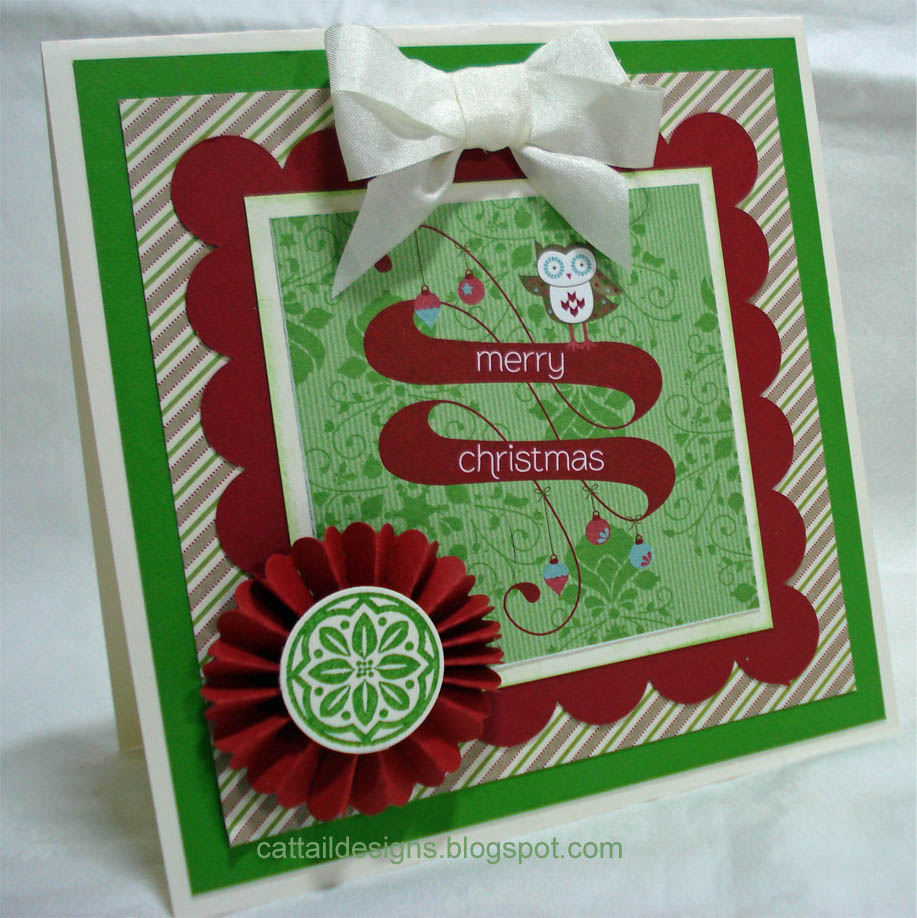
I had an ornament exchange with some friends. Originally I planned on just using a couple of the rosettes back to back with ribbon in between, but it just grew on me. Then I planned to stop after the back side red piece, but then I got the doily and I had the gold paper so it just grew again.

Supplies:
Brushed Gold cardstock.  #102935, Page 160
Paper Doily Sizzlits L die   #125592, Page 191
Fun Flowers Bigz L die.   #121812,  Page 193
Designer Series Paper stacks  #117152  Page 154  In Subtles
1 3/4 Inch Scallop round punch  # 119854, Page 184
Postage Stamp punch, #122344,  Page 182
Floral Frames Framelits #127012, Page 191   (used the smallest one, in gold at the very top)
1/4 inch Stitched Grosgrain ribbon in Real Red, #126875
Pearl basic Jewels #119247   Page 175
Simply Scored tool, #122334 or
New SU Trimmer,  #126889
There is a Designer Rosette Bigz XL die, but in this case I just made my own.
Instructions for the rosette:
You can use the Simply Scored scoring tool or the trimmer with 1/4 inch marks. The new SU trimmer works great for this, it has both the cutting and scoring blades parked on it at all times.
Cut your strip for the rosette 9 3/4 inches long by 1 1/2 inches wide. Make it 1/4 inch wider if you want to use an edge punch on one edge.
Score every 1/4 inch down the length of the strip, do a fan fold on score lines all the way down the strip, then glue the ends together.
Using a glue gun, you will need to glue it together down the center. First, take the circle you've made, pressing down and toward the center make it lay flat, glue down that middle. You can use a 1 inch punched circle to help hold it and add a finishing touch if you like.

Don't feel like you have to use every tool I have, look around you at what you and and see what you can put together. I hope you enjoyed this and it gives you ideas of your own.


Friday, November 9, 2012

Ten days of Christmas, Day 9

Be sure to come back tomorrow for your surprise, I have something special for you.

This is my second favorite card that I have done for this season. I am quickly falling in love with stamping then dry embossing over top, such beautiful texture.

Colors:
Whisper White
Cherry Cobbler
Crumb Cake
Always Artichoke
Other products used:
Embellished Events (Sentiment)
Ornament Keepsakes stamp set and
Holiday Ornament Framelit dies, Bundle ( Holiday catalog)
Watercolor Winter Stamp set
Silver Stampin Dazzle Marker
Blender Pen
Lacy Brocade embossing folder ( Holiday Catalog)
Bakers Twine, Cherry cobbler and whisper white
Cherry Cobber embossing powder
Versamark ink pad for embossing
The Watercolor Winter stamp set is a 2 process stamp set. It has a fill it part you stamp first then you stamp the outline over the top. I choose not to do it this time. I stamped the outlines and colored them in using my blender pen, dipped into my cherry cobbler and Crumb cake ink pads.
When I finished coloring in, added my sentiment, I then ran it through the Big Shot using the Lacy Brocade folder.  Stamp your choice of Ornaments with the Versamark, emboss and cut using the matching die.
I colored the white edge using the Dazzle Marker, put Stampin Dimensionals on the back, attaching the twine using a small piece of it and added it to the layer of the card. Put enough twine that you have bring it over the top and glue on the back side, wrap using the Cherry cobbler twine and attach to your card.

To Order Stampin Up go HERE


Thursday, November 8, 2012

Day 8 of the Ten Days of Christmas

Very simple card. It looks bigger, but it's a simple A2 standard card size. It's pretty self explanatory, so will just tell you that the set used is Snow Swirled, Page 18 in the main catalog. It's my favorite, oh think I said that before. . All product by Stampin UP.
To order Stampin Up product in plenty of time for your Christmas projects, go HERE.

Wednesday, November 7, 2012

Day 7 of the Ten Days of Christmas

This is such a pretty and easy card. Snow Swirled is my favorite Christmas set of the year, but I just love swirly graphics.
Start with Midnight Muse card stock, layer Whisper White, then with the top layer of Midnight Muse, Stamp and emboss both the tree and the sentiment ( Curly Cute set). Use Silver embossing powder. Put the ribbon/bow on before attaching so you can tuck the ends under and add on the rhinestones to the tree.
That's it, done!

I have something special for you on day 10 that I just know you will enjoy. I can hardly wait.
Hope you will come back tomorrow for day 8.

Tuesday, November 6, 2012

Day 6 of the Ten Days of Christmas

Welcome to day 6, this has been fun for me, hope you all are enjoying it too. On the bigger plus side, I'm getting all my Christmas cards done. How are you coming with yours?

Today I have a very clean and simple card for you.   The red strip was made using a wheel. Not even a Christmas wheel, it's called Daydreams, good all year long.

TIP:  Don't worry about ink colors for wheels if you don't have what you need. Simply run the wheel over a stamp pad until it's inked up well.

Cut and fold your card, ink up your wheel, using a ruler or other straight line, run the wheel across a piece of CS. Cut close to edges, layer a piece of black a 1/2 inch larger. That gives you 14in top and bottom, before you glue them together wrap your ribbon tucking a small amount under each end. Glue it all down.

Stamp sentiment, I cut it out using my Bigshot and the Labels Collection Framelits, but you can use whatever punch or die cut you have that will fit your sentiment.  Cut a second one the same out of black, layer them letting the black show a bit. Tie a bow and place under the sentiment. I colored in the ornament in the sentiment using a Dazzle marker.

That's it for this one.
Colors:  
Cherry Cobbler
Whisper White
Basic Black
Tools and accessories:
Cherry Cobbler seam binding
Daydreams wheel
Labels coll framelits dies
Word Play stamp set
Gold Dazzle marker

To place an order, you can go HERE 
Hope to see you tomorrow for day 7.

Monday, November 5, 2012

Mojo Monday 266 and Day 5 of the 10 days of Christmas

Since I am in the middle of the 10 Days of Christmas here, I of course, had to do a Christmas card for the challenge.
I simplified it just a little bit, with the busy background and A2 card size, I didn't want too much on it. I used
Whisper White
Cherry Cobbler
Snow Festival Designer Paper pack from the Holiday catty
Certainly Celery
Layer the DSP over the white CS, cut your white tag, then slightly smaller the certainly celery tag and glue together.  Cut a white square, layer a slightly smaller Cherry Cobbler square over top.  Stamp out the pointsettia from Water Color Winter, punch out using the 2 3/8 in scalloped round. I inked the edges and also used a blender brush to color in.
TIP:  With the new stamp pads be sure to wipe some off after putting the tip of the brush in the pad, for the inside coloring. You can leave it for the vanes and outside edge.
Stamp sentiment from Snow Swirled.  Attach the scallop round using Stampin Dimensionals.  and attach to card.
See you tomorrow!

Sunday, November 4, 2012

Day 4 of the 10 days of Christmas

I'm a little late today, sorry about that. I had chest pains yesterday morning and have been in the hosp. They still don't know what happened, but I am just happy to be home.
This is my favorite card of all the ones I have done so far this year. And, it's so simple.
Colors used:  Perfect Plum, Very Vanilla
Other stuff:  Keepsake ornament stamp set and die cuts, Perfect Plum 1/4 inch ribbon, Very Vanilla Seam binding, Fancy Fan embossing folder, Corner rounder, Rhinestone basic jewels (pg 175 main catty).
Petite Pairs stamp set,  Clear embossing powder.

Instead of cutting cardstock landscape, cut down the center lengthwise,  fold plum cardstock to make care.
Use corner rounder on the bottom corners.  Cut Very Vinally slightly smaller, I left extra space on the bottom and attached right at the top of the plum.  Stamp sentiment, then run through the embossing folder, attach to card. 
To stamp the ornament, first load the stamp up with Versamark ink, then stamp onto the Perfect Plum pad, then stamp the paper. Quickly cover with clear embossing powder. Heat being careful to not over heat, when the embossing powder turns shiny, it's done.
Attach a piece of Perfect Plum ribbon, add Stampin Dimensionals  and attach to card. Stick a rhinestone to center. Tie a seam binding ribbon around top of ornament.
Hope you enjoyed and I sparked an idea for you. See you tomorrow.

To Purchase Stampin Up from me, CLICK HERE

Saturday, November 3, 2012

Ten days of Christmas, day 3.

I love the old fashioned look of this set of stamps, and the sentiment is beautiful and really adds to the card.
I wanted to keep the traditional feel of the holidays so mostly used  neutral colors.
Always Avocado, Crumb Cake, Soft Suede, Real red
Taffeta ribbon,  Christmas Lodge stamp set, Scallop border punch. 

This is a quick and easy card, have fun with it, see you tomorrow.

Friday, November 2, 2012

Day 2 of Ten Days of Christmas

This is a standard A2 card, I used this size most of the time. They fit in the envelops we all have for cards and it's just easier all the way around. Also, I send cards to OWH (Operation Write Home) those are hand made cards that go to our troops so they can send cards home to friends and loved ones. And this is the size they need to be for that.
Colors:
Whisper White,  Brushed Gold, Marina Mist
Other supplies:  En Francais background stamp, Labels Collection Framelits die cut set, gold embossing powder, Polka dots embossing folder, Keepsakes Ornaments stamps and Holiday Ornament framelits die set. Whisper White seam binding. Versamark ink pad
The ornament stamps and die cuts can be purchased in the Holiday catalog for a discounted price if bought together.

Cover your background stamp with ink from the Versamark ink pad, the easy way is to lay the stamp down face up and pat over it with the ink pad. Stamp onto your Brushed gold paper cut slightly smaller then the card.  Quickly pour embossing powder over stamped image and when done tap to get any extra powder off the card.  Heat with an embossing gun.
TIP: If you haven't embossed before, hold the image toward a light source, a window during day time is fine, and watch it as you heat, soon as an area turns shiny it's done, move around the image  until it's all shiny. It's easy to heat too much and then the embossing will just disappear, so be careful.
Stamp and cute out your ornament, select a Label die that will work for the size of your ornament, run it through the embossing folder, also die cut a gold ornament and layer the die cuts together, attach to the card using Dimensionals. Cut a piece of seam binding to fit around the front of the card, and to the back an inch or so on either side, glue down. Stamp Sentiment to a one inch strip. The ends were cut using a one inch round punch, attach.
I hope I've sparked some ideas, see you tomorrow. 


Thursday, November 1, 2012

PPA146 and Day one of the 10 Days of Christmas

Thanks for coming by, this morning I'm posting a PPA color challenge, and making it my first day of my Ten days of Christmas, come back tomorrow for day 2.
We were to use Stampin Up colors Crumb Cake, Very Vanilla, and Robin Hood Red.

I choose a different size this time. I have a bunch of red #10 envelops sitting here I bought for 50 cents after christmas at an office store and I sometimes look for ways to use them. Here is my result.

Colors:
Crumb Cake, Very vanilla, Robin Hood Red.
Tools:
Scallop trim border punch, 2 3/8 inch scallop round punch, and the 2 1/2 inch round punch.
Stamp sets:
Four Seasons hostess set, Sentiment is from Christmas Lodge.
Cut your Very Vanilla  8" x 9 1/8", fold to make a 4 x 9 1/8" card.
Cut a piece of Crumb Cake the length of the card by 3 inches, then cut a matching size border and glue together.  cut a 1 1/2" piece of the red, and wrap the ribbon, I used s slightly darker ribbon in Soft Suede, I also used Soft Suede for the sentiment.
Stamp the bird graphic from Four Seasons and punch using the scallop punch, cut a red piece using the 1 1/2" round punch.  Adhere using Stampin Dimensionals. Stamp Merry Christmas along the side. Stamp the snowflakes if desired. I used White.
See you tomorrow.
 

Tuesday, October 30, 2012

10 days of Christmas

I've decided it would be fun to post a 10 days of Christmas blog event.  So, starting on Nov 1, I'll be posting a Christmas card or project every day.  That's just 2 days from now. I hope you'll check them out each day and that I can spark an idea for your own cards. 

I'll be getting together with friends soon to work on our cards to be sent. I hope to have mine done early this year! Yeah, right! LOL.

So, come on by and please let me know what you like and don't like.

Monday, October 29, 2012

A big sale at SU, and Mojo Monday 265

Before I go any further, today and today only Monday, Oct 29th 2012, Stampin Up is having a one day sale like never before, every stamp and stamp set is on sale for 15% off!    Exceptions are bundles, wheels and hostess sets. So hurry and place your order right now, just in time for your Christmas cards.
To order from me, go here.


Now, on to Mojo Monday.   Love, love, love todays sketches, choices of round or square cards this week.
Here is the sketch.
Pretty neat huh? Now here is what I came up with early this morning.
Colors:
Very Vanilla
Gumball green
Cherry Cobbler
Patterned paper:
Festival of Prints DSP (2 sheets in the pack come with a patterned side and a side with decorative squares.)
Snow Festival DSP, (comes in a 6 1/2x4 1/2 inch pad of double sided paper) 
Stamp set:
Ornament Keepsakes ( In the Holiday catty) I used it for the small circle on top of the rosette, you can use anything you have.
At the center of this card is a square from Festival of Prints designer paper pack, also in the Holiday catty. 
You will find it on my SU site available for download if you don't have it.
So, square card, very vanilla, Snow Festival  paper cut to size, 4 3/9 inch scallop square, from the Bigz duo die, square cut of very vanilla with inked edges, then the square from the Festival of prints.
I added the rosette, I cut a 1 in wide by 9 inch long piece of cardstock, scored every 1/4 inch. (Super easy using the brand new SU cutter, avail Nov 1.) fold back and forth at each score, glue ends together. Set the rosette down, push in toward center until it lays flat and use a glue gun to hold right in the center. 
Tip: Use the new Silicone mat available in the Holiday catty, the glue will peal right off. 
I topped the rosette with the stamped circle, cutting it out with the 1In circle punch, and added the very vanilla seam binding for a bow. 
Happy stamping. Thanks for stopping by.   
    

Wednesday, October 24, 2012

Simply elegant

A very simple and effective card, I made this one a birthday card, but it would work for other occasions.
Colors:
Perfect Plum
Whisper White
Other Elements:
Curly Cute Sentiment
Crochet Trim
Delicate Designs and Adorning Accents embossing Folders
Perfect Plum brads from the Regals Brad pack
All by Stampin Up
I hope you enjoy.

To order Stampin Up, go here:

Monday, October 22, 2012

Mojo Monday 264

If it's Monday, it's Mojo monday, love mojo monday. What a fun sketch today, I hope you like what I did with it. Here is the sketch
I just love red and purple together. And I recently bought the Sizzlits Paper Doily, it's too cool.
It makes a fantastic bag topper as well as looking great on cards.
Colors are
Real Red
Perfect Plum
Very Vanilla
Punches:
Paper Doily Sizzlits
2 1/2" Round
Scallop Trim Border punch
Decorative Label Punch
Boho Blossoms punch
Stamp set:
Blooming with Kindness
And the Perfect Polka Dots Embossing folder
Use 1/2 sheet of Very Vanilla folded over for card, make the next vanilla layer slightly smaller, emboss with the folder, ink edges with Perfect plum.
Layer the doily, then a strip with the border adhired to the bottom, retanglar vanilla piece over that. I used the gold marker in the Holiday Catty for the lines around.
Then layer the circle and stamp sentiment, then punch out of vanilla.
Ribbon (perfect plum grossgrain, retired) and punched out the boho blossoms, layered and added a pearl.
Thanks for looking

Friday, October 19, 2012

Snow Swirled

I am so sorry, I left you all and have been gone for 3 weeks. We had a great time, attended a rally, saw lots of old and new friends and went lots of places and saw lots of neat stuff.
We had a spot right up front at one campground that was awesome. Every morning and late afternoon the deer would come out looking for food. There was usually at least 18 or 20 of them total, including a couple babies.
Now, back to Stampin Up and making cards and gifts. Snow Swirled caught my attention right off. I love this set, it's so usable. This is a pretty simple card:
 Colors:
Bashful Blue,
Marina Mist,
Whisper White.
Perfect Polka Dots Embossing folder
2 1/2 inch Circle punch
1 3/4 inch scallop punch
Marina Mist Dotted Swiss Ribbon
Decorative Label punch ( cut after first punch and punched again on the other side)
Snow Swirled Stamp Set
Use the snow flake stamps in the stamp set using Bashful Blue on the white paper, then run it through the big shot using the embossing folder.  Ink the edge all the way around using either Bashful blue or Marina Mist depending on the look you want.
Cut a piece of the ribbon just a little bit bigger then the size of the white card and apply using glue ( the Snail adhesive works great for this) and wrap the ends of the ribbon under the card. Glue to the Bashful blue card.
Stamp your snowflake using Marina Mist, I used the new foam ink pad and then wet embossed using Clear embossing powder. Cut out using the scallop punch.  Cut out the larger circle, ink edges, apply the scallop piece using Stampin Dimensionals, to the large circle. Stamp greeting and apply to corner.
Hope you enjoy this one, I love how it turned out and how simple it is. Have a great weekend.

Wednesday, October 3, 2012

Cupcakes and such

Today I'm not home but I have a cute little birthday card for you.  All products from Stampin Up.

Monday, September 24, 2012

Mojo Monday 260

Another Mojo Monday, this challenge really keeps me on my toes. 
For this week, I have an anniversary card for friends of ours. They are in their mid 70's, were child hood sweethearts and just got married 5 years ago.
I'm a little late, but they have been traveling  in their coach and we are planning a tiny surprise. Their wedding cake was carrot cake and we will have a small one or carrot cake cupcakes waiting for them at their house in the fridge with the card underneath.  Don't want them to think we forgot.

So, here it is, I'm planning on putting a piece of Very Vanilla inside for my message.
Colors: Night of Navy, Daffodil Delight, Very Vanilla.
Stamp sets: Friendly Phrases, Four Seasons ( Hostess set)
Also used, Perfect Polka Dot embossing folder
Scallop Edge punch
Floral Framelits die set
Bigz L Fun Flowers
Designer Series Paper Stacks (Pg 162 in the 2012-2013 catty)
Daffodil Delight Seam Binding
I used the very vanilla DSP over the Night of Navy card base, it has a very muted design. The center graphic and the leaves are both from Four Seasons. I LOVE that darling little leaf, and it's perfect for fall.
Thanks for stopping by.

Sunday, September 23, 2012

I'm a guest stamper

I'm thrilled to be todays guest stamper at Stampin Pretty. (www.stampinpretty.com)  I had a lot of fun coming up with something fun and ended up with 2 to choose from. Mary liked them both, so here they are.


The first one is a mini album made using the SU Framelit Labels Collection dies. I choose the size I wanted, cut 2 pieces for front and back out of chipboard. I used cereal boxes, they cut beautifully using the die and are heavy enough for your covers. I covered each one on both sides with Designer paper from one of the DSP pads, the covers were done in the Neutrals pad. Some of the inside was done using the Subtles Pad
I used colors, Pretty In Pink, Crumb Cake, Soft Suede, Gumball Green.
I used the Elements of Style stamp set and blinged it up with rhinstones.
On some of the inside pages I put a second piece cut to make it only take up a partial page and glued to make a pocket so things can be tucked inside.
I used my Zutter binder for this, but It might even look better with one or two binder rings as the edge is quite small on this die. You can also add ribbons to the rings and anything else you like to fancy it up.


Next I did a small gift bag, started out using a lunch sack, I embossed the whole top with the Perfect Polka Dots embossing folder, then cut the very top edge using one of the 2 Adorning Accents edge dies. You can get a matching embossing folder that looks awesome with the edge die as well.
I cut the flowers out using the Bigz L Fun Flowers die. This is quickly becoming my all time favorite die set. So many beautiful shapes all in one set!
Colors, Rose Red, Pretty in pink, Daffodil Delite and Wild Wasabi.
For the leaves I used the SU Sizzlits Little Leaves die, I'm finding it so handy.
I punched holes in the folded over top for the ribbon and tried both a bow and tying it under the flap. Let me know which you liked best, I couldn't decide. So here is a picture of the other way.
I sure hope you enjoy these and that it gives you some ideas for your one projects.