Tuesday, May 28, 2019

A little bit of lace, Paper Players #443


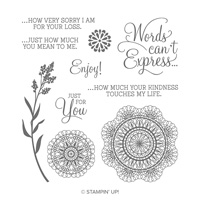
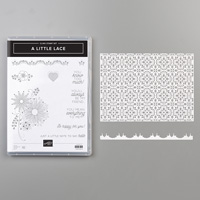
This graphic in the new A Little Bit of Lace stamp set has been calling to me since I first saw the new catalog.  BTW, it goes live on June 4th, so be ready.
Anyway, everyone has been making stuff with the lace die an it is truly gorgeous, but I also just couldn't wait to get my hands on this stamp set.  All the stamps are so adorable and the fonts are awesome.

So, I used the sketch from the Paper Players this week for my card. Worked out perfect.
See the challenge here.


The card base is a new incolor Purple Posy and it matches up with our other 2 new purples, Highland Heather and Gorgeous grape!

It lace die will do a full sized card, but can also be cut into whatever sized pieces you would like, as I've done here.
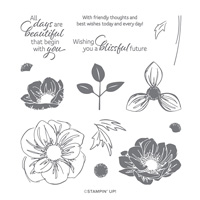
I stamped and embossed my flowers in gold embossing, then colored on the back side of the vellum.  Love how it turned out!    The sentiment came from the new Floral Essence stamp set.
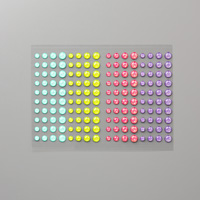
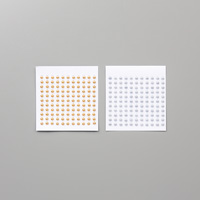
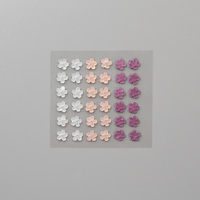
I also used Metallic Pearls in gold, the set of little tiny pearls comes with both gold and silver.  And I used Glitter Enamel Dots in the center of my flowers.

Wednesday, May 22, 2019

Pot of Flowers to say Hello, Paper Players challenge #442


Playing along with the Paper Players this week.  It's a clean and simple challenge and as much as I would have loved to have sprinkled some splatters around, I restrained myself.


Just go to the Paper Players site to join in or see everyone's projects.

I used the pot from the  set Crafting Forever, stamped it and cut the pot out from around the brushes it was holding.  Then I took the little flower set from Birthday Posies  and stamped that with the pot sitting in place but now popped up yet.  
I colored in the tiny flowers and leaves using Blends markers, set my pot down using dimentionals, stamped my little Hello from Itty Bitty Greetings.
My embossed panel under the design is Layered Leaves.
 I stamped and colored in 2 more little design pieces from the Birthday Posies for scattered flowers.


Saturday, May 18, 2019

Sneak Peek New annual catty, Floral Essence, JAI#457


I'm combining some brand new items from the 2019-2020 annual catalog with the Challenge this week at Just Add Ink.     Here's the sketch:
My centerpiece flower is from the new set Floral Essence.  It's a gorgeous set and bundles with a punch.  I don't know about you but although I do love dies, punches are just easier to grab and use, so usually I'll be buying those sets. Not to mention, sets with a punch usually are less expensive as well.    A second punch that you may already have, a leaf punch, works on the leaves you see here which are also in the set. 

The color flower color and the card base color are Rococo Rose, a new incolor.  I'm in love after seeing it on a card. It pairs well so far with Flirty Flamingo and Blushing Bride, my leaves are Soft Sea Foam, which also seems to be working well with the rose.

The die cut I used at the bottom is from a new bundle called Good Morning Magnolia bundle.
Also used was the Stitched Shapes for the circle, and the Stitched Rectangle dies for the sentiment piece.  It was a bit too long, so I just did a banner end on it to shorten it up.

The sentiment is from the By The Bay set.
I hope I've given you some inspiration today, that is my aim.


New Sneak peek at Stampin Up, Free as a Bird


Yup, a new annual catalog is making it appearance, and it won't be long before it goes live.  On June 4th 2019 You will be able to order from this new catalog and I know you are seeing all kinds of samples already.  This set, Free as a bird, comes as a bundle with a big set of dies in the shape you see behind the birds.  It's called Stitched nested Labels dies. It also has one straight stitched die included. 

I used Cajun Craze to stamp and color most of the bird, but added in a bit of pink on the tummy and blue up around the neck.  I used the Blender pens for this, not the alcohol ink Blends, but the Blender pens you can just touch to your ink pads and use to color with changing colors as you please using the same one.

Flowers were done with Flirty Flamingo and the ribbon here is a left over spool from when this color as an incolor.   My green stitched rectangle is in Mossy Meadow as are my leaves. 
This was just one of the cards I did for my class last week, I'll be posting the other two over the next few days. 
Just a reminder that the current annual catalog is coming to a close, if there is something retired you want from it, or if you want something that is a bundle, do place an order very soon.   Even if the parts of the bundle carry over, you will loose the 10% price as it will no longer be sold as a bundle. 

Thanks for stopping by.

Friday, May 3, 2019

Happy kitty, FMS#386


Wouldn't you just love to be floating along in this boat with kitty?  Looks perfect to me.
Head on over to FMS and see what the team has made using this sketch.  

I used Balmy blue, Coastal Cabana, Soft Suede, Daffoldil Delight, Smoky Slate and Flirty Flamingo. 
I am a huge fan of not only oceans, but also kitties, hense the name Cattail Designs, and this has both. 
I hope you enjoy.

Friday, April 26, 2019

Glad we're friends, fms#385


This card was such an easy, quick one to make.  One of those rare times when the idea pops into your head and works out better then you planned.
The strip and the flowers and butterfly are all cut from the All My Love DSP.  I think it's got to be the most gorgeous paper we have ever had. 

This card was made for the Freshly Made Sketches challenge, 
Come play along, and check out the lovely cards from the team.

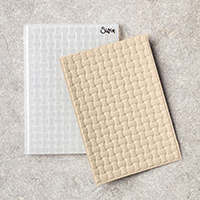
I placed my strip then sub'd a piece of plan paper, then stamped my background floral bushes from the Healing Hugs stamp set.    Then I embossed using the Subtle folder before completing the rest of my design.

I fussy cut 2 flowers out of the dsp, and one set of leaves, after gluing down the CC strip, I added my flowers using Stampin Dimentionals, then put my leaf set behind the one flower.    I had this small butterfly stamped laying on my desktop and it was just what I needed.    I had used the Butterfly Gala stamps for that the other day.

The sentiment came from Fable Friends, and I used a sentiment die from the Lakeside Framelit set to cut it out from.   I added 3 gold jewels and that was it.   The base card is Soft Sea Foam,  I layered my top piece and glued that down and was done.


Wednesday, April 24, 2019

Paper Players #438, Just for you Butterfly Gala


Wow, I can't believe I haven't posted a card in so long.  We have been pretty sick at my house, and that would be the reason.  
Some great challenges have come and gone, many I kept intending to do, but ended up just too sick.  Today I'm doing the Paper Players challenge.


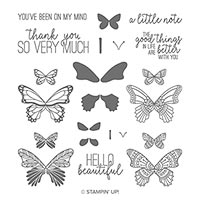
Paper Piecing is using DSP instead of plain cardstock or?  I stamped my butterflies on some pieces of All My Love DSP and punched them out using my Butterfly Duet punch. I also punched out the same pieces without stamping to put under the stamped ones.

I used a piece of the black and white from the DSP for an accent.  I used watercolor paper and just lifted ink off my ink pads with an Aqua brush putting it on the spritzed watercolor paper.   I had cute the watercolor paper out using the Rectangle Stitched Framelits.

My sentiment is from Dear Doily.  Colors are: Flirty Flamingo, Basic Black, Lovely Lipstick.
Thanks for stopping by.


Saturday, April 6, 2019

Rainbow Easter card, FestiveFriday#0031


Another Easter card, it's kinda like Christmas, Ideas keep coming.  I'm not sure how many more I can get done in time, but probably one or two more. Last years set, Hold On To Hope has made them so easy.

I'm doing this one for the Festive friday challenge. You can see it here.

The challenge is Earth day or Rainbow, and I choose Rainbow, it worked out to be just what I had in mind.   I cut a piece from one of the 12x12 pieces in the Beautifully Detailed DSP, to fit the front of my card, then I sponged my rainbow onto the white card layer.

My colors are:  Balmy Blue, Lovely Lipstick, Gorgeous Grape, Highland Heather, Pineapple Punch and Lemon Lime Twist.

I added a die cut in Pineapple and layered white, then Highland Heather die cut cross on top and used a skinny die cut also from the Rectangle dies with the sentiment.
The sentiment is from Itty Bitty Greetings.


Thursday, April 4, 2019

Happy Spring, fms#382


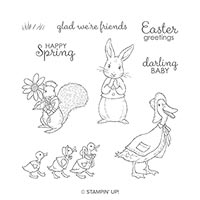
Out for a walk in their Easter finery.   What a fun set to play with.  And a great card to send to friends who don't celebrate Easter.

My inspiration for this one was the FMS 382 challenge, check it out here.


I used a big fat round brush, for the grass and sky. I just brush it a couple times on the pad, then hit it on my paper so I don't have too much on, then lightly brush back and forth. It can take awhile to get just the right look, you don't want to try and apply too much at one time.   Then I used the little grass stamp to make the grass better.

I left my ducks white and just colored in their easter outfits. For that I used ink pads and a blender pen.
The sentiment was die cut with one of the dies in Lake Side Framelits, then cut on one side.
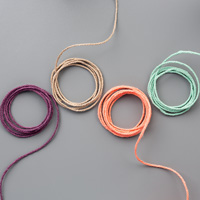
The twine came in a 4 pack in the annual catalog.


Tuesday, April 2, 2019

Easter Blessings, #PP435


My second Easter card going out to family and close friends.  My first hoop full of lace crosses is now done, so I've included one of them with this card.  I'm using the Paper Players challenge for my inspiration on this one. 
As you can see, so many choices here. I choose the diagonal, Patterned paper, embossing and easter.

The Designer series paper here is part of a suite for this years Butterfly stamps, dies and punches. The set encompases 2 different butterfly sets, one has dies and one has a punch.  It's in the Occasions catalog which is still in effect, but has sold out and hopefully will be coming back.    The ability to just die cut whatever color butterfly fro the DSP is really awesome. DSP does not usually carry over, but I sure hope this one does. 

The sentiment and the little cross are both retired.  The little cross comes from Hold on to Hope from last year. 

I'm sending these with lace butterfly crosses that I made on my embroidery machine, just a little extra something. 

I hope you enjoy and have a wonderful Easter.

Wednesday, March 27, 2019

Easter Blessings, fms#381


I decided that this year I would send Easter cards to my girls and a couple of friends, they will get an embroidered lace cross bookmark inside.
This is the first card, I got my start with the Freshly Made Sketches challenge for this week.
Check it out here and see all the lovely projects.


I did use retired product on this card, the  set of stamps and dies with the cross is from Hold On To Hope set from last year.  I think it's the best set of it's kind SU ever put out, so I hung on to it. Everything else is current although the foil here is not available as it was SAB and is gone, but we have plenty of foils in the annual catalog.
I started by choosing my DSP, this one is from All My Love DSP, that gave me my colors. I then went to the cross and got it done and stamped and went down the layers.  The sentiment is from a new product in our annual catalog, Itty Bitty Greetings.

My colors are: Whisper White, Crumb Cake, Flirty Flamingo, and Lovely Lipstick.
The die for the sentiment is from Lakeside framelits in the annual catalog.


Tuesday, March 26, 2019

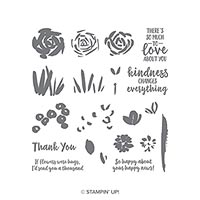
If Flowers were Hugs, Just Add Ink #449


This weeks challenge is so bright and springy, having said that, it can be a bit harder to use 3 very vibrant colors together.  The trick is to use small amounts of one or two of the 3.
Here is the challenge:


Check out the challenge and all the other projects here.

The Gorgeous Grape is actually a dark enough color that I was able to use a bunch of it, and while I used the Bermuda Bay as the base card, I only used it very lightly for the sky.
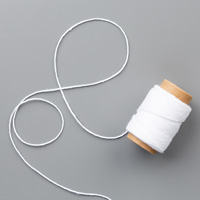
Then just touches of Lovely Lipstick, I love doing the small amount on the sides with just a bit on the design to bring it all together.    I added the Whisper White twine just for a bit more texture and softness.
To get that very light look for the sky, I used a very large round brush, lightly brush it twice over the top of the ink pad, do a quick brush on paper to avoid dark blotches and then lightly start brushing across the area to be colored.  It take several times to get the look you want, but is very worth while taking your time with that part.

I hope you enjoy, thanks for stopping. If you have questions, please ask in comments, I'll answer there as well as soon as I get the comment.