Showing posts with label Flower Fair Framelits. Show all posts

Thursday, January 7, 2016

Stampin Up, Pals Paper Arts Challenge #282


This week is a sketch challenge for the PPA, please come and join in, we have made a few changes as well.

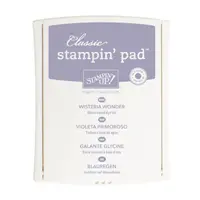
I'm enjoying using some pretty and springy colors.  For this I used Tempting Turquoise and Wisteria Wonder.

Here is the sketch:
Click here to see the teams cards.


Saturday, July 26, 2014

Stampin Up, Flower Patch get well


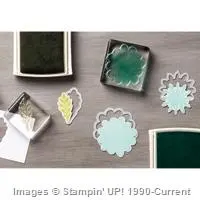
I need a get well card and I just love the new Flower Patch set along with the matching framelits, Flower Fair.

A very simple card, I used a piece from the All Abloom DSP set.

I used Smoky Slate for my card base, it's one of my favorite colors. It just seems to go with everything, such a wonderful neutral color.

Thanks for stopping by, hope you have a wonderful weekend.


Monday, July 14, 2014

Stampin Up, Mojo Monday 354, Thinking of You


I'm still having fun with the Flower Patch stamp set, it makes it so easy to be able to stamp and cut using photopolymer stamps and die cuts. This is one great set, called Flower Patch.

I was looking around for colors I hadn't used in a while and decided on aqua and purple, two colors I just love together. Of course I just had to toss in a bit of green, I mean I see other people using strange colors for leaves, but can't bring myself to do that. LOL.

The cute wavy lines are from the Chalk lines stamp set, there is also a couple colors in one of the small paper pads with this design. I thought it was super fun to have the stamp as well.
And this pretty soft 1/4" cotton ribbon is so beautiful and fun to use.
So, here is the sketch for this week.
It's a fun one, why not give it a try, it really helps to grow your skills.


Tuesday, July 1, 2014

Stampin Up Class projects


I thought I'd post my other 2 class projects for June.  Often I don't post them at all, and always wait at least until after class so they can be surprised.
The first uses the stamp set,  Work of Art. This has turned out to be such a great set, so many, many ideas have been shown using it, including several patriotic designs. 

The second card using the new Photopolymer bundle. Flower Patch Stamps and Flower Fair Framelits.  I don't think it gets any better then this.  There is so much you can do with this set, even without the framelits.   It's Photopolymer so you can see right through it. That allows for double stamping, in this case I stamped off on paper first then on the card, then inked up again and stamped on top of that with the next stamp and you can just keep going with that.

I do have a tip for using the Photopolymer stamps tho, sometimes you may need something made from foam to stamp on to get a better impression. You can use the Piercing mat, but if you don't have that a piece of fun foam or a mouse pad will work.
Also, big tip:  when using Photopolymer stamp, when done with one and taking it off the block but you are not ready to put it away just yet, be sure to put it on another block or something. They get lost so easy!  I keep my biggest block out and change them over to that until I'm sure I'm done and putting them away.   If it falls on the floor or even moves around on the desk, it can be impossible to find.

Hope you enjoyed these, my class really had fun with them.


Tuesday, June 24, 2014

Stampin UP, A fun Class project


My monthly class was today, this set was far and away a favorite.  When I first saw it in the new catalog I knew it was going to be one of my very first purchases.  It's called Flower Patch and it has framelits for all but one or two small items, the framlits are called Flower Fair.   It is on bundle price however, so an excellent deal.

This set is a photopolymer set, so you can see completely through it for placement. That allows for over stamping, which just gives you so many more ways to use the set.

For my colors on this I used, Mossy Meadow, Hello Honey and Crisp Cantaloupe. I did the first stamping by inking up my stamp, then stampin off onto paper, then onto my card. Inked the next stamp and stamped on top of that image on the card. So, you get what looks like two colors.  You get a whole different look using 2 different colors and/or using the dies to cut then apply.
This next picture is a card I made showing how you can make it even better.

I used the Hardwood background stamp to make a fence on this one.

Thanks for stopping by, let me know if I can answer any questions.