Saturday, November 3, 2012

Ten days of Christmas, day 3.

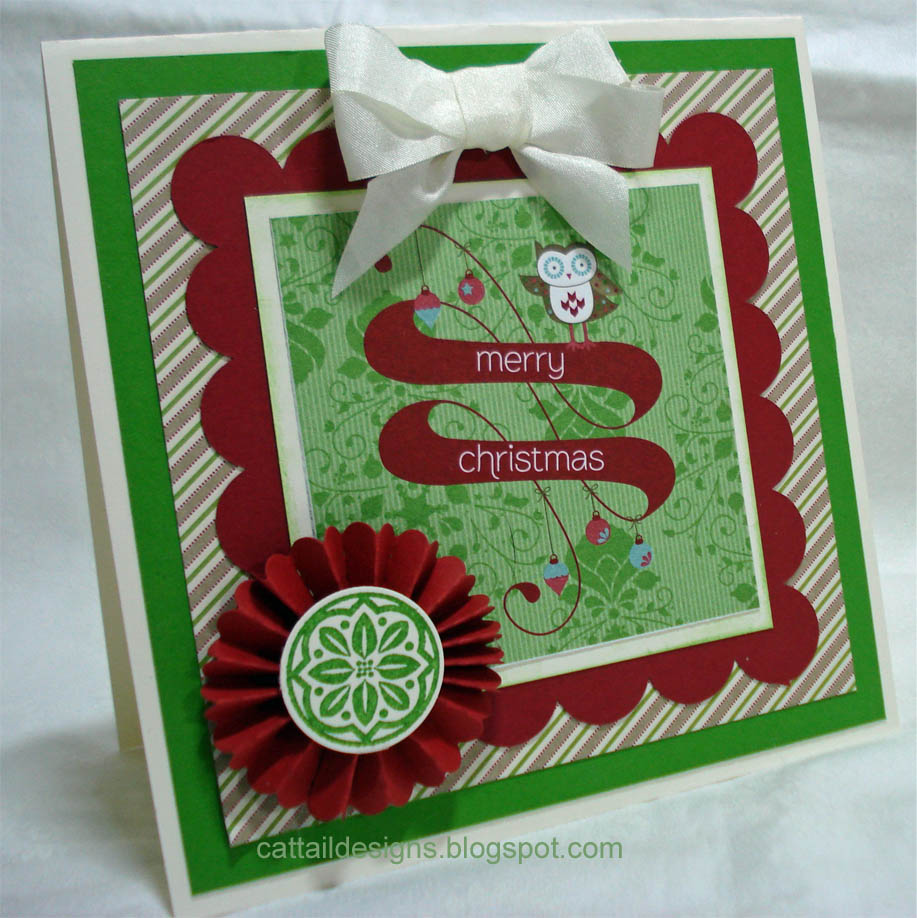
I love the old fashioned look of this set of stamps, and the sentiment is beautiful and really adds to the card.
I wanted to keep the traditional feel of the holidays so mostly used  neutral colors.
Always Avocado, Crumb Cake, Soft Suede, Real red
Taffeta ribbon,  Christmas Lodge stamp set, Scallop border punch. 

This is a quick and easy card, have fun with it, see you tomorrow.

Friday, November 2, 2012

Day 2 of Ten Days of Christmas

This is a standard A2 card, I used this size most of the time. They fit in the envelops we all have for cards and it's just easier all the way around. Also, I send cards to OWH (Operation Write Home) those are hand made cards that go to our troops so they can send cards home to friends and loved ones. And this is the size they need to be for that.
Colors:
Whisper White,  Brushed Gold, Marina Mist
Other supplies:  En Francais background stamp, Labels Collection Framelits die cut set, gold embossing powder, Polka dots embossing folder, Keepsakes Ornaments stamps and Holiday Ornament framelits die set. Whisper White seam binding. Versamark ink pad
The ornament stamps and die cuts can be purchased in the Holiday catalog for a discounted price if bought together.

Cover your background stamp with ink from the Versamark ink pad, the easy way is to lay the stamp down face up and pat over it with the ink pad. Stamp onto your Brushed gold paper cut slightly smaller then the card.  Quickly pour embossing powder over stamped image and when done tap to get any extra powder off the card.  Heat with an embossing gun.
TIP: If you haven't embossed before, hold the image toward a light source, a window during day time is fine, and watch it as you heat, soon as an area turns shiny it's done, move around the image  until it's all shiny. It's easy to heat too much and then the embossing will just disappear, so be careful.
Stamp and cute out your ornament, select a Label die that will work for the size of your ornament, run it through the embossing folder, also die cut a gold ornament and layer the die cuts together, attach to the card using Dimensionals. Cut a piece of seam binding to fit around the front of the card, and to the back an inch or so on either side, glue down. Stamp Sentiment to a one inch strip. The ends were cut using a one inch round punch, attach.
I hope I've sparked some ideas, see you tomorrow. 


Thursday, November 1, 2012

PPA146 and Day one of the 10 Days of Christmas

Thanks for coming by, this morning I'm posting a PPA color challenge, and making it my first day of my Ten days of Christmas, come back tomorrow for day 2.
We were to use Stampin Up colors Crumb Cake, Very Vanilla, and Robin Hood Red.

I choose a different size this time. I have a bunch of red #10 envelops sitting here I bought for 50 cents after christmas at an office store and I sometimes look for ways to use them. Here is my result.

Colors:
Crumb Cake, Very vanilla, Robin Hood Red.
Tools:
Scallop trim border punch, 2 3/8 inch scallop round punch, and the 2 1/2 inch round punch.
Stamp sets:
Four Seasons hostess set, Sentiment is from Christmas Lodge.
Cut your Very Vanilla  8" x 9 1/8", fold to make a 4 x 9 1/8" card.
Cut a piece of Crumb Cake the length of the card by 3 inches, then cut a matching size border and glue together.  cut a 1 1/2" piece of the red, and wrap the ribbon, I used s slightly darker ribbon in Soft Suede, I also used Soft Suede for the sentiment.
Stamp the bird graphic from Four Seasons and punch using the scallop punch, cut a red piece using the 1 1/2" round punch.  Adhere using Stampin Dimensionals. Stamp Merry Christmas along the side. Stamp the snowflakes if desired. I used White.
See you tomorrow.
 

Tuesday, October 30, 2012

10 days of Christmas

I've decided it would be fun to post a 10 days of Christmas blog event.  So, starting on Nov 1, I'll be posting a Christmas card or project every day.  That's just 2 days from now. I hope you'll check them out each day and that I can spark an idea for your own cards. 

I'll be getting together with friends soon to work on our cards to be sent. I hope to have mine done early this year! Yeah, right! LOL.

So, come on by and please let me know what you like and don't like.

Monday, October 29, 2012

A big sale at SU, and Mojo Monday 265

Before I go any further, today and today only Monday, Oct 29th 2012, Stampin Up is having a one day sale like never before, every stamp and stamp set is on sale for 15% off!    Exceptions are bundles, wheels and hostess sets. So hurry and place your order right now, just in time for your Christmas cards.
To order from me, go here.


Now, on to Mojo Monday.   Love, love, love todays sketches, choices of round or square cards this week.
Here is the sketch.
Pretty neat huh? Now here is what I came up with early this morning.
Colors:
Very Vanilla
Gumball green
Cherry Cobbler
Patterned paper:
Festival of Prints DSP (2 sheets in the pack come with a patterned side and a side with decorative squares.)
Snow Festival DSP, (comes in a 6 1/2x4 1/2 inch pad of double sided paper) 
Stamp set:
Ornament Keepsakes ( In the Holiday catty) I used it for the small circle on top of the rosette, you can use anything you have.
At the center of this card is a square from Festival of Prints designer paper pack, also in the Holiday catty. 
You will find it on my SU site available for download if you don't have it.
So, square card, very vanilla, Snow Festival  paper cut to size, 4 3/9 inch scallop square, from the Bigz duo die, square cut of very vanilla with inked edges, then the square from the Festival of prints.
I added the rosette, I cut a 1 in wide by 9 inch long piece of cardstock, scored every 1/4 inch. (Super easy using the brand new SU cutter, avail Nov 1.) fold back and forth at each score, glue ends together. Set the rosette down, push in toward center until it lays flat and use a glue gun to hold right in the center. 
Tip: Use the new Silicone mat available in the Holiday catty, the glue will peal right off. 
I topped the rosette with the stamped circle, cutting it out with the 1In circle punch, and added the very vanilla seam binding for a bow. 
Happy stamping. Thanks for stopping by.   
    

Wednesday, October 24, 2012

Simply elegant

A very simple and effective card, I made this one a birthday card, but it would work for other occasions.
Colors:
Perfect Plum
Whisper White
Other Elements:
Curly Cute Sentiment
Crochet Trim
Delicate Designs and Adorning Accents embossing Folders
Perfect Plum brads from the Regals Brad pack
All by Stampin Up
I hope you enjoy.

To order Stampin Up, go here:

Monday, October 22, 2012

Mojo Monday 264

If it's Monday, it's Mojo monday, love mojo monday. What a fun sketch today, I hope you like what I did with it. Here is the sketch
I just love red and purple together. And I recently bought the Sizzlits Paper Doily, it's too cool.
It makes a fantastic bag topper as well as looking great on cards.
Colors are
Real Red
Perfect Plum
Very Vanilla
Punches:
Paper Doily Sizzlits
2 1/2" Round
Scallop Trim Border punch
Decorative Label Punch
Boho Blossoms punch
Stamp set:
Blooming with Kindness
And the Perfect Polka Dots Embossing folder
Use 1/2 sheet of Very Vanilla folded over for card, make the next vanilla layer slightly smaller, emboss with the folder, ink edges with Perfect plum.
Layer the doily, then a strip with the border adhired to the bottom, retanglar vanilla piece over that. I used the gold marker in the Holiday Catty for the lines around.
Then layer the circle and stamp sentiment, then punch out of vanilla.
Ribbon (perfect plum grossgrain, retired) and punched out the boho blossoms, layered and added a pearl.
Thanks for looking

Friday, October 19, 2012

Snow Swirled

I am so sorry, I left you all and have been gone for 3 weeks. We had a great time, attended a rally, saw lots of old and new friends and went lots of places and saw lots of neat stuff.
We had a spot right up front at one campground that was awesome. Every morning and late afternoon the deer would come out looking for food. There was usually at least 18 or 20 of them total, including a couple babies.
Now, back to Stampin Up and making cards and gifts. Snow Swirled caught my attention right off. I love this set, it's so usable. This is a pretty simple card:
 Colors:
Bashful Blue,
Marina Mist,
Whisper White.
Perfect Polka Dots Embossing folder
2 1/2 inch Circle punch
1 3/4 inch scallop punch
Marina Mist Dotted Swiss Ribbon
Decorative Label punch ( cut after first punch and punched again on the other side)
Snow Swirled Stamp Set
Use the snow flake stamps in the stamp set using Bashful Blue on the white paper, then run it through the big shot using the embossing folder.  Ink the edge all the way around using either Bashful blue or Marina Mist depending on the look you want.
Cut a piece of the ribbon just a little bit bigger then the size of the white card and apply using glue ( the Snail adhesive works great for this) and wrap the ends of the ribbon under the card. Glue to the Bashful blue card.
Stamp your snowflake using Marina Mist, I used the new foam ink pad and then wet embossed using Clear embossing powder. Cut out using the scallop punch.  Cut out the larger circle, ink edges, apply the scallop piece using Stampin Dimensionals, to the large circle. Stamp greeting and apply to corner.
Hope you enjoy this one, I love how it turned out and how simple it is. Have a great weekend.

Wednesday, October 3, 2012

Cupcakes and such

Today I'm not home but I have a cute little birthday card for you.  All products from Stampin Up.

Monday, September 24, 2012

Mojo Monday 260

Another Mojo Monday, this challenge really keeps me on my toes. 
For this week, I have an anniversary card for friends of ours. They are in their mid 70's, were child hood sweethearts and just got married 5 years ago.
I'm a little late, but they have been traveling  in their coach and we are planning a tiny surprise. Their wedding cake was carrot cake and we will have a small one or carrot cake cupcakes waiting for them at their house in the fridge with the card underneath.  Don't want them to think we forgot.

So, here it is, I'm planning on putting a piece of Very Vanilla inside for my message.
Colors: Night of Navy, Daffodil Delight, Very Vanilla.
Stamp sets: Friendly Phrases, Four Seasons ( Hostess set)
Also used, Perfect Polka Dot embossing folder
Scallop Edge punch
Floral Framelits die set
Bigz L Fun Flowers
Designer Series Paper Stacks (Pg 162 in the 2012-2013 catty)
Daffodil Delight Seam Binding
I used the very vanilla DSP over the Night of Navy card base, it has a very muted design. The center graphic and the leaves are both from Four Seasons. I LOVE that darling little leaf, and it's perfect for fall.
Thanks for stopping by.

Sunday, September 23, 2012

I'm a guest stamper

I'm thrilled to be todays guest stamper at Stampin Pretty. (www.stampinpretty.com)  I had a lot of fun coming up with something fun and ended up with 2 to choose from. Mary liked them both, so here they are.


The first one is a mini album made using the SU Framelit Labels Collection dies. I choose the size I wanted, cut 2 pieces for front and back out of chipboard. I used cereal boxes, they cut beautifully using the die and are heavy enough for your covers. I covered each one on both sides with Designer paper from one of the DSP pads, the covers were done in the Neutrals pad. Some of the inside was done using the Subtles Pad
I used colors, Pretty In Pink, Crumb Cake, Soft Suede, Gumball Green.
I used the Elements of Style stamp set and blinged it up with rhinstones.
On some of the inside pages I put a second piece cut to make it only take up a partial page and glued to make a pocket so things can be tucked inside.
I used my Zutter binder for this, but It might even look better with one or two binder rings as the edge is quite small on this die. You can also add ribbons to the rings and anything else you like to fancy it up.


Next I did a small gift bag, started out using a lunch sack, I embossed the whole top with the Perfect Polka Dots embossing folder, then cut the very top edge using one of the 2 Adorning Accents edge dies. You can get a matching embossing folder that looks awesome with the edge die as well.
I cut the flowers out using the Bigz L Fun Flowers die. This is quickly becoming my all time favorite die set. So many beautiful shapes all in one set!
Colors, Rose Red, Pretty in pink, Daffodil Delite and Wild Wasabi.
For the leaves I used the SU Sizzlits Little Leaves die, I'm finding it so handy.
I punched holes in the folded over top for the ribbon and tried both a bow and tying it under the flap. Let me know which you liked best, I couldn't decide. So here is a picture of the other way.
I sure hope you enjoy these and that it gives you some ideas for your one projects.

Thursday, September 20, 2012

Pals Paper Arts Challenge 143

Good morning!  I have a PPA ( Pals Paper Arts ) challenge card for you today.
This clean and simple sketch was done by Pal Margaret Moody.
Here is my take on this one.
It really was quick and easy. I used Whisper white, Very Vanilla, Soft Suede colors.
The background piece is from the Festival of Prints paper pad DSP that is in the Holiday Mini.
It's sized at 4 1/2" x 6 1/2" so is perfect for using on cards.
I layered Soft Suede cardstock under Very Vanilla.  The image from Element of Style stamp set.
I used Crumb Cake seam binding for the ribbon/bow and cut a 1 3/4" scallop Circle then layered the Very Vanilla after stamping the sentiment from Petite Pairs stamp set, and punched out the 1" circle.


Monday, September 17, 2012

Mojo Monday 259 and Christmas

I couldn't help myself, I did a Christmas card. It's kinda like when the stores put holiday things in too soon, I have to be ready, more ideas are better.
So, here is today's sketch.
And I have to put here that I am so sorry. LOL. I wondered off sketch. It's a darling sketch, but when I got started it had a life of it's own. So, here it is.
It's pretty simple and very doable.  I used one of the new incolors, Raspberry Ripple along with Whisper White. The stamp set is Snow Swirled, I'm finding so many ways to use it. I also used the Crochet trim, Stripes embossing folder, Dots embossing folder, Apothecary Accents Framelits, Holiday Ornaments Framelits, (from the Holiday Mini) and Glitter Brads.
Hope this gives you some ideas.

Thursday, September 13, 2012

Are you ready for a Christmas card?

I know it seems like it's early, and many of us have been looking ahead and posting Christmas ideas. Personally, the sooner I get going on mine the better.I just get too stressed out when I run out of time.
So today I have a card for you using the Ornament Keepsakes Bundle.
You get all the stamps and matching die cuts for one bundle price. I think these are timeless, and I think you will get years of use out of them.

It is hard to see the gold paper, but it is a shimmery gold, really pretty. I cut my hole in my Whisper White CS, embossed it using the new Lacy Brocade folder in the Holiday Mini catty. Stamped my choice of ornaments from the set, inked up the edges, then attached to a bow out of  Bakers Twine.
I used Cherry Cobbler for my red, stamped my sentiment from Petite Pairs stamp set, and punched out using the stamp punch, then inked the edges and attached to the red square.  Rhinestones on the corner complete this card.
I hope you enjoy.

Tuesday, September 11, 2012

Sept PAL's Blog Hop


Glad you could join us for some fun fall crafting with the Stampin' Pretty Pals! You've probably hopped over from, Sherrie at Stampin Sunshine,  I'm stop number 12 on the Pals Hop and I'm glad you hopped in! I'll help you "hop along" from blog to blog where you'll find great ideas for Stampin' Up! fall projects! Should you hop off course, simply click on any of the links in the Pals Hop Line-up below and you'll be back on track.

 I kept my card clean and simple, colors used are Crumb Cake, Pumpkin Pie, Soft Suede, Perfect Plum and Wild Wasabi.
I used the Stripes embossing folder for the first Perfect Plum layer. Then I cut a 2 1/2" circle from Soft Suede and inked the edges in Pumpkin Pie. I punched out 7 large ovals and a green piece from the Sizzlits Little Leaves die. 

I used Crumb Cake Seam binding for the ribbon. I really love the seam binding, it's so soft easy to work with. 
Sentiment is from Petite Pairs, and I added some dots of Dazzling Details. 


Now hop along for more inspiring ideas from Dawn at Tiddbits from Dawn, stop number 13 on the Pals Fall Flair Blog Hop! Thanks for "hopping" by!


    Monday, September 10, 2012

    Mojo Monday 258

    Yup, it's that time of the week again. I missed a couple being gone from home, but am so glad to be home and am loving this sketch.
    It's just a really fun sketch, so many ways to play. Now, here is my take on it. I might have gotten a little carried away with color, but it for sure is bright and happy.

    Colors used are Certainly Celery and Island Indigo, I considered some pink with it, but all three would have been a bit much, but Island Indigo would be wonderful with pink.
    I used Island Indigo for the base card. If you want a lighter inside to write on, just cut a piece of paper a little smaller then the inside and glue on. I love using my Whisper White ink pad for my sentiment inside. Be careful if you do, it's really super juicy, a light touch with the stamp is all that is needed on the pad and on the paper.
    layered the base card with certainly celery embossed with the Stripes folder, then cut 2 strips from a paper in my little DSP Festival of Prints pad. The size of the paper pad works really well with cards, It's 4 1/2"x 6 1/2" and is printed on both sides of the paper.
    I cute my strips at 3/4", measured the center on one end and put a pencil mark then cut. If you have a smaller square punch you can use that for your ends. I cut the flowers out from the Big L Fun Flower Die in both colors, embossed the larges Island Indigo and smallest Certainly Celery using the dots embossing folder. I punched out two circles and cut in half for the top, added a pearl to my flower, and stamped the Thank You with the Perfectly Penned sentiment set.
    Thanks for looking.

    Saturday, September 8, 2012

    Too Pink

    We have done true blue, now it's Pink's turn.

    I didn't start out to make this quite so pink, but as often happens, it just happened.  My favorite thing about this card is the gorgeous taffeta ribbon, this one is Pink Pirouette. It's just gorgeous ribbon.
    Colors for this card are: Pretty In Pink, Pink Pirouette, Rich Razzelberry. The stamp set is Priority Mail, it's a great all purpose set. And I used the Stamp Punch.

    I embossed the Rich Razzelberry using the Petals a Plenty folder, layered that over Pretty In Pink card.  I cut out a strip of Pink Pirouette about 2 1/4 " wide by the length I needed to fit, used my scallop edge punch on one side, then layered a strip of Pretty In Pink over top, inking the edges first.
    Stamped, punched and cut out the stamp designs, Happy Birthday and Eat Cake and layered them on using dimensional spots.

    I put another strip of Pink Pirouette at the top edge attaching the ribbon at the back side before attaching the strip to the Rich Razzelberry.

    I hope you enjoyed this one. I have a Pink fend friend that is going to get this one.

    Wednesday, September 5, 2012

    True Blue


    My favorite color is blue, mostly I have to make myself use other colors. So, I gave in on this one, and used some of my favorite blues.
    Midnight Muse, and Marina Mist with Whisper White. The pattern background is from the Holiday Mini catty, Festival of Prints. It comes in 4 1/2"x 6 1/2" pad, perfect for cards, and some really great patterns.
    Flowers were cut using the Floral Frames Framelits and the Big Shot and the little butterfly in the middle is from hte Four Seasons stamp set.  I love this set, such different and fun stamps.
    My ribbon is Midnight Muse stitched ribbon, and you can get it free all this month! Just order $40 in product and pick a spool of incolor ribbon free with your order!
    As a final touch I added the pearls and a brad on the flowers.  Sentiment is from Friendly Phrases.
    I also used the scallop border punch on the pattern paper and inked up the edges of the flowers a little. I love little touches like that. All products are Stampin Up.
    I hope this gives you some ideas of your own, happy stamping.

    Monday, September 3, 2012

    Mojo Monday 257 And a little tip

    It's monday again and it's time for another Mojo monday challenge card. I can't wait to send this one out to a very good friend who is having a birthday next week!  Here is this weeks sketch.
    And here is my take.
     I used a combo of Perfect Plum, Crumb Cake and Certainly Celery, also pattern paper from the neutrals and subtles DSP paper packs, I am really finding those pattern papers handy. I also used the scallop edge punch, Big L Fun Flowers die, Perfect Plum Taffeta ribbon, Petite Pairs sentiment, and brads from the Subtles brads collection.
    I made my card 5x7 for this challenge.
    My little tip is to use the paper piercing template in the Essentials pack to line up your brads, just make a small dot using the piercing tool or a pencil, then punch over the top.


    Saturday, September 1, 2012

    Back to Spool Time

    Get your free spool or spools of ribbon now. Stampin up has a promotion for Sept. Spend just $40 and get a free spool of In Color ribbon, you get one spool for each $40 you spend.  From one to all 5 colors.  I can tell you, it's really gorgeous ribbon, I love it because it's so soft and easy to work with. My fav for making bows.
    Click to order on the right hand side.